Moving as asset
When you move an asset, you should log where it’s been shifted to. This is to make it possible for your colleagues, and engineers, to find assets reasonably easily.
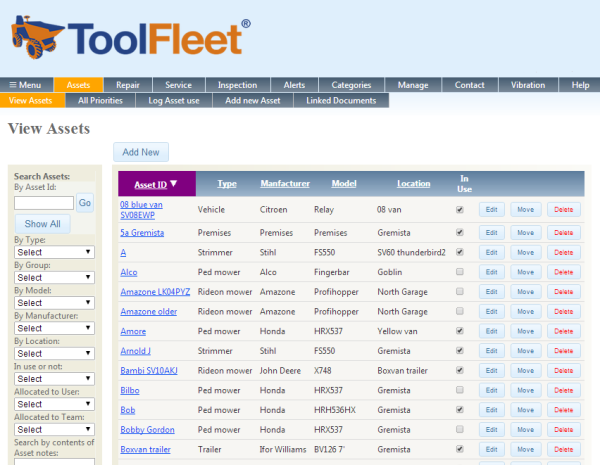
To change an asset’s location in ToolFleet, you can do this via “Assets” / “View Assets”. Find the asset you want in the list, and click either “Move” or “Edit” for that asset. Change that asset’s location by selecting the new location from the drop-down menu, then hit the big “Save asset” button at the foot of the screen.

If you’re filling in paper forms, write a note somewhere on the form, if you’re aware that an asset has moved to a different location.
Putting an asset into use or out of use
This is done from the ‘View assets’ list. The purpose of putting assets out-of-use, is so that they don’t continually appear as red-alerts in your overdue ‘inspection’ and ‘servicing’ lists.
You would put an asset ‘out of use’ ONLY if it does not require inspections or servicing, and if your staff have no use for it. In other words, if you want to merely store it, but not use it in the foreseeable future, ie, not in the next year or so.
There are a few reasons why an asset might be deemed ‘out of use’:
- It is broken beyond foreseeable repair, but you want to keep it to cannibalise for spares, or fix it when time and resources allow at some point in the distant future.
- You have no foreseeable purpose for it.
- It is not an asset which is safe to use, perhaps due to changes in legislation.
You should NOT put an asset ‘out-of-use’, if you’ve merely returned it to your vehicle / shed / workshop after you’ve finished working with it!
1. What is ToolFleet?
2. Logging in.
3. Finding what you’re looking for, in the asset lists.
4. Logging information.
5. Raising ‘alerts’.
6. Moving an asset, and putting an asset in-use / out of use.
7. What’s ‘Group’ for?
8. What to do if you need help, or hit a technical difficulty.
9. A final word.


