What are categories for?
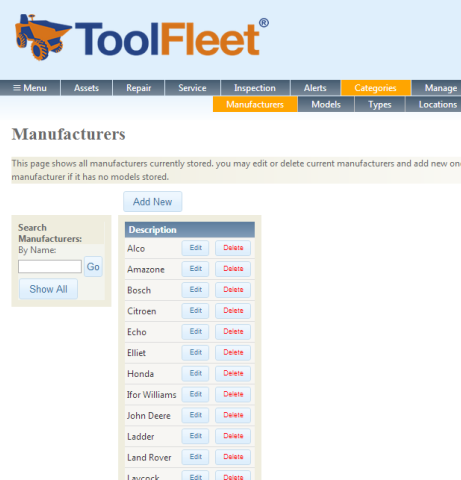
 Categories are used for sorting and organising your lists of assets. The categories used for sorting and filtering within ToolFleet are:
- Manufacturers (eg, ‘Ford’, ‘Volvo’, ‘Stihl’).
- Models (eg, ‘Transit’, ‘EC180D’, ‘TS410’).
- Types (eg, ‘Vehicle’, ‘Excavator’, ‘Cut-off saw’).
- Locations (more details on this below).
- Workshops (the places where repairs and maintenance and done, this is likely to be a combination of in-house and outsourced).
- Teams (your departments or squads – eg, ‘brickies’, ‘divers’, ‘office staff’).
- Groups (custom category – click here for more details).
It would be advisable to set up your most common categories (manufacturers, models etc), before you start adding your assets. This will make adding individual assets a bit easier.
The process of adding new categories is straightforward – simply select the category you want to populate, then click the ‘add new’ button, input and submit it.
It’s also possible to add new categories at a later stage, where you’re adding individual assets. If you can’t see your manufacturer or suchlike on the list, simply select ‘other’, and you’re given the chance to add a new item to your category list, at the same time that you’re adding your new asset.
Advice on setting up ‘locations’.
Your “locations” should list everywhere that you might keep an asset. Typically, this will be a list of your buildings, vans, and suchlike.
Note – It is also common practice to list people as ‘locations’ in some instances, when they are in charge of assets which move with them wherever they go – eg, a car. You can also allocate these assets to that ‘user’.
There are times when subdividing your locations could be handy, for example into separate rooms within a building, but there’s only one main “level” of location within ToolFleet, so you’re best to avoid subdivision. It is however, possible to add extra location detail within the asset “notes”.
The asset “notes” are searchable within the sort/filter section of all the asset ‘list’ pages, which can help if you’re using the “notes” to provide additional categorisation of your assets (for another way to provide additional categorisation, read about user-definable “groups”, in the ‘new user’ guide).
Let’s look at an example. You might have “Headquarters” listed as a location. If you’ve a room within your Headquarters that you want listed separately, such as “HQ room 3”, then if you set up “Room 3” as a separate top-level location, and run a search on “Headquarters”, the “Room 3” stuff will not appear in that search. In this instance, you would have to run two searches, if you wanted to find everything within the whole building.
To overcome this, you could write something in the asset notes like, “In Room 3“. Or perhaps a little more detail – “Usually kept in the locked chest, upon the shelf above the tiger cage, in Room 3, in the west wing at HQ – the key for the chest is hanging from the tiger’s collar”.
There’s the further complication of what to do when a location moves about the place! For example, you might list a “boxvan trailer” as a location, because it can contain other assets. The trailer might be parked at a building site one day, then at your HQ the next. A search for all the assets at HQ will not show up the assets within the boxvan trailer – those would require a separate search. This shouldn’t generally present too much of a problem though, vehicles and trailers are usually reasonably easy to track down via their ‘team’ or ‘user’.
1. Management tips, for successful implementation of your maintenance system.
2. Set up new users’ accounts.
3. Upload your logo.
4. Give all your assets a unique ID.
5. Setting up ‘categories’.
6. Add your assets individually, or upload multiple assets in a batch.
7. Set up your inspection and service intervals for each different model.
8. Fit hour-meters to any assets that don’t have them.
9. Times when you might want to make use of paper forms, instead of keying data in directly.
10. Admin tips.


